Posts

Showing posts from November, 2022

Windscreen

Image
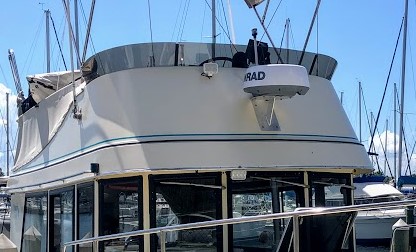
  Well after 22 years, the Acrylic windscreen on the flybridge broke. Of course dropping the Bimini top on it didn't help! Smooth move. I read on the Camano Facebook Group where others had them replaced and at a cost of $800, although a fair price for custom work, I felt I could get the same results for less. Being an old "Shop Teacher" from the 80's, we used Acrylic frequently and always fabricated it by hand. The techniques are a little different but most of the same tools are used.  Materials. I secured a sheet of 1/4" Acrylic. 1/4" Acrylic is really .220 thick. I couldn't get Smoke colored but did get a Gray color #XA-2064 from RS Supply in Port Richie, Florida.  A tool I didn't have was the special Acrylic Point Drill Bits. You cannot use a standard wood twist bit, as they tend to "grab" the material as the bit passes through and most of the time will crack the Acrylic.  Step 1: I labeled each piece with "BOW OUT" and "

AIS 2 - The devil is in the Details

Image
  AIS Screenshot I failed to outsmart the marine electronics world. If you read my original AIS blog entry , I thought that by upgrading my marine VHF radio with built in AIS I would save the time, money and hassle of having to purchase and install a separate AIS transponder. Wrong....well right, sort of. With built in AIS in the VHF I could see vessels with AIS and get their info, but they can't see me with their system. That could work, but somewhat defeats the purpose of why I wanted AIS in the first place. The inland river systems are loaded with tows, barges and ships. If that mile long tow & barge is coming around one of the many sharp bends of the river, their radar will not see a vessel around the corner. AIS means not only can they see my vessel, they know the type, speed, position, direction and my vessel name, allowing them to call me by vessel name and tell me what they would like me to do upon our meeting and provide me with the same identification.  Once again I s

Battery Switch

Image
  Blue Sea System 9001E Battery Switch Pau Hana never had a battery switch for the main engine. It just seems prudent to have one in case for instance the starter stuck and the power needed to be turned off. Another issue I had was that I had no way to charge the generator battery. I did run a wire to the battery charger but that only works if the battery charger is running.  My solution was to install a 3 position switch for the engine and move the generator battery next to the Engine battery and wire that to the switch as well. The new switch would do 4 things. Allow me to shut off the engine battery Start the engine from either battery Combine the batteries for starting Charge the generator battery  First I made a Starboard bracket for the battery switch that fastened to an upright next to the existing battery.  New Battery Switch & Backer                             Next I installed 2 new Group 27 size battery trays 90 degrees to the direction of the existing starting battery.