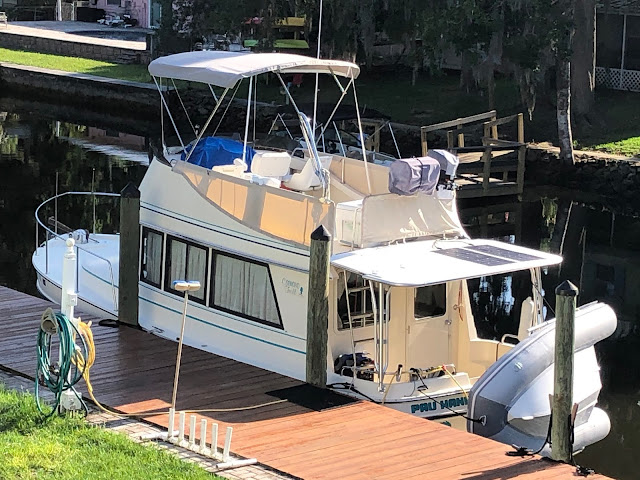
.....and it's all right! The rear deck on Pau Hana has a fantastic aluminum & fiberglass cover over it. The skin is a thin fiberglass panel that the previous owner used to store his Port-A-Bote. I had another idea. Since the day I saw the area I thought "Solar Panels".
A WORD OF WARNING: This is the first time I have dealt with any solar panels or installation, that said I may not have done part or any (for that matter) of this project correctly. This is just how I did it, you should do your own research to decide how to properly install any item on your boat, especially if it is electrical in nature.
There are so many choices of panels. I did find from my research that they are not all created equal and like anything else, some are better than others as they may use a better quality materials. There are basically 3 types of panels. Monocrystalline, Polycrystalline and Thin Film. Monocrystalline is the best and most efficient type.
I measured the area and found I could get two 100 AMP solar panels on there. It would be great to have more but this should provide us with enough battery charging capability to run the refrigerator & a few other 12 volt items while at anchor and keep our batteries charged. The proper way to determine how much solar you need is to find out what your intended load is. I really could have used about 330 Watts but only really had room for 200 Watts. Still adequate.
I have 4 batteries on Pau Hana - 1 starting battery for the diesel, 1 starting battery for the generator & 2 Group 27 Deep Cycle Marine Batteries for the "house". My existing batteries were 4 years old and I had already needed to add water to them a couple times so I figured I needed to start fresh. I installed 2 new House batteries.A Group 27 battery should provide from 85 to 105 Amp Hours each for a total of the 2 at 170 - 210 Ah
I did some research on solar panels & equipment and found a ton of info & kits. Since there is so much equipment readily available I put my own system together.
I ordered:
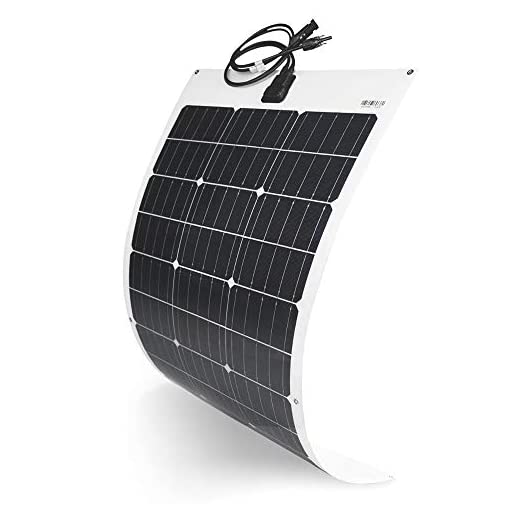
- 2 - Flexible 100 Watt 12 Volt Monocrystalline Solar Panels
- 2 - "Y" Branch Parallel Adaptor Cables
- 1 - 20' of 10 AWG Extension Cable
- 1 - 20 Amp MPPT Solar Charge Controller
- 1 - 25 Amp Breaker
- 1 - Battery Switch
- 1 - 1100 Watt 12V Power Inverter
- Misc. Connectors
I had some 6 AWG red & black wire to go from the controller to the battery, so that saved me some money. All together I spent about $400. Very reasonable as some of the kits I saw were pushing $1100.
The first thing I did was clean & paint the hard top & install the panels. Each panel had 6 grommet holes for mounting. I didn't want to "punch" any holes in the top so I used a "blob" of 5200 adhesive at each of the grommets, squeezed it through & added a little more to the top. I set some small paint cans as weights on the panels & let them dry.
Next I attached the "Y" cables to the panels, secured them to the top and routed them below. From that point I routed my extension cable to my panel location. CAUTION: DO NOT connect the extension cable to the panels! As soon as the panels are out, they are generating voltage. If you make the connection, you are essentially working with "hot" wires. There is a sequence of connections I will explain later.
With the cables routed, I installed the MPPT Controller. A word about controllers. There are two basic types, MPPT & PWM. PWM is less expensive than MPPT, but is not as efficient as the MPPT. Although MPPT is more expensive (I spent about $84 vs about $15 for PWM) It lets the solar panels operate at their most efficient point for the conditions and is most efficient for battery charging.
I mounted the controller next to my electrical panel. This particular controller has a connection for a battery temperature sensor (provided) and an optional Bluetooth module so that you can download an App & see how the panels are performing. I didn't order the Bluetooth module (maybe later). I had to expose the connection wires under the control panel, it wasn't ideal but it was the best I could come up with. I wish the wires were connected to the rear. It would have made for a neater look.
Below the controller I mounted a 25 Amp breaker to interrupt the power from the panels. Based on the output of the panels (maybe 12 Amps) I probably could have gone smaller, maybe 20 Amp?
Next to that I installed a battery switch to turn the power off to the batteries.
Here is the important part. ALWAYS connect the batteries to the controller first & connect the solar panels to the controller last.
With all the wires routed & everything in place, I went back to the panels & snapped the connectors together.
The MPPT controller is pretty automatic but works with different types of batteries so it is important to set the unit for the type of batteries you have.
The sun was just going down but the controller lit up & the panels were instantly producing power. Not a lot but it worked! Bring on the sun!
I have installed an 1100 Watt Power Inverter close to the batteries and from it I ran a separate outlet.
The Inverter came with a remote control so I routed the wire up to the new outlet.
Now we can use some 110 Volt devices without having to start the generator...especially a coffee maker on those quiet anchorages!


Comments
Post a Comment