With all of the electrical components in it's time for some muscle. The pump. I didn't go with Raymarine's pump but instead talked to my friend Tony Athens of Seaboard Marine who suggested I use the Kobelt Accu-Steer. Based on the Ram size I got the HRP-11 12volt. It was a little less expensive than the Raymarine as well. The pump seems pretty "beefy" and weighs about 10 pounds. I was disappointed that the leads where copper and not tinned. Tinned copper wire is much better on a boat as plain copper corrodes (turns black) over time and does not perform/conduct as well.

I decided the best place to mount the pump would be in the Lazarette under the cockpit floor. The reasons: 1. The Ram was there. 2. The Ram already had "T" fittings on it. 3. It meant only 2 short hoses (to the existing "T"s and 1 long hose to the lower station. 4. Plenty of "dry" room. 5. Easy access & out of the way.
I needed to make a bracket for the Rudder Reference. I used some good grade plywood and a piece of aluminum to get the height I needed. The Rudder Reference can be mounted many different ways and you may have to get creative here. I chose to mount mine "upside down". This got it out of the way and still helped conserve some storage space in the Lazarette. I takes some calculating and care but you need to ensure that the Rudder Reference is parallel and square to the rudder bar to provide the most accurate reading and make sure it doesn't bind.
I mounted another piece of plywood aft behind the Ram for the pump, glued it & screwed it down.

Finally I mounted the pump & connected the power supply. I shortened the 14 ga. wire from the pump, added a 30 AMP fuse & connected it to the 12 ga. wire from the ACU. I left the fuse out for now so the pump wouldn't accidentally engage while I was completing the system.
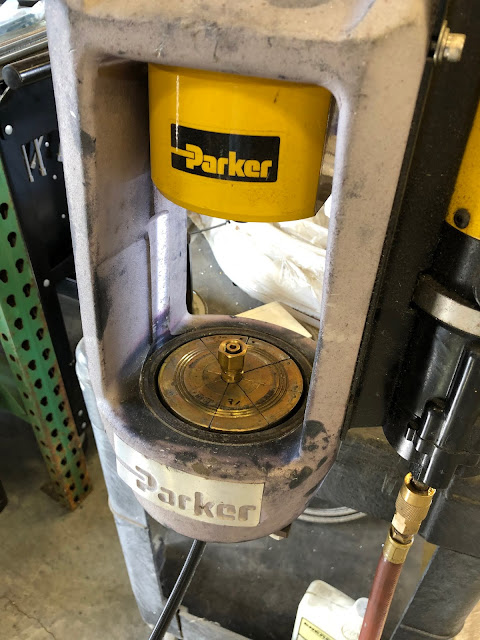
I measured my tubing runs & ordered the necessary parts to make those up. As always, having good friends with tools you don't want to buy for 1 job came in handy. A friend of mine had a hydraulic crimper and made up the tubing runs for me, but there are companies that will make them up or you can use compression fittings. These fittings were really nice, I like them much better than the compression type & plastic tubing that is in the boat now. I used 2 - 3' hoses for port & starboard & 1 - 23' hose for the return line to the helm.
I pulled the long 23' hose to the lower helm and fastened & labeled it. Now I could button up all the access areas.
I attached shut off valves to the motor as suggested by the manufacturer, so that if the pump fails it can be disabled & I can maintain steering. I had to be a little creative with the order & how I fastened them so they would all screw in.
I used Loctite 567 Thread Sealant on the 1/4" NPT fittings only, the other -06 SAE ORB fittings have "O" Rings in them and require no sealant.
With as many fittings on as I could get on, I drained the steering fluid. I opened the fill on the upper station wheel & removed the "bleeder" end on the ram "T" and recaptured the fluid to reuse. I got about a quart of fluid. The steering fluid is crazy expensive, around $20 or so a quart so I want to reuse what I can. I removed the bleeder valves and attached the port & starboard hoses.
I had to install an extension and an elbow at the lower helm to make it clear the other hoses.
With everything hooked up, I went to the upper station and began adding fluid back into the system. Since I eliminated the bleeder valves (I used that location for my pump connections), it was a little more time consuming to get all of the air out of the system.
I hung the container of fluid from the Bimini Top and cut the bottom out to provide air & so I could add more fluid as it was needed. I worked the steering wheels at both helms back & forth several times to remove air & left the whole thing over night to allow all the air to bubble out.
SET UP & COMMISSIONING
First, at the dock I simply powered up the unit and completed the Start Up Wizard to set Language & Boat Type.
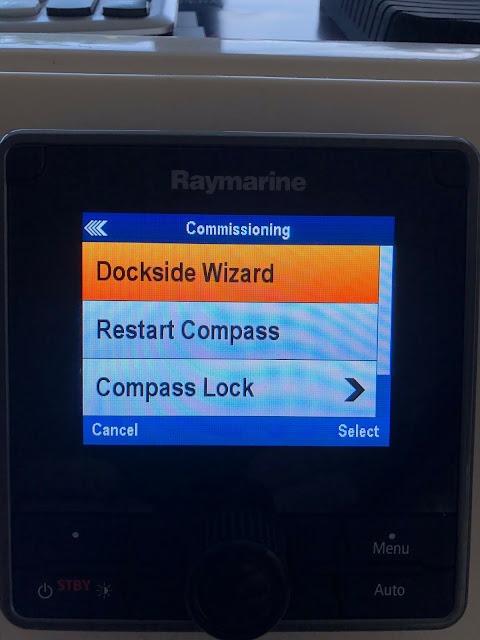
The Raymarine Evolution system is pretty simple to commission. Using the Dockside Wizard you select your Drive Type, Check your Rudder Alignment, Set the Rudder Limit & Hard Over Time then the Pump pushes the rudder to Port, Starboard & Center & you're done.
I did have to swap the port & starboard (red & green) wires on the rudder reference since I hung it upside down.
Away from the dock. When the EV unit is powered up, the internal compass compensates for the local magnetic variations & the earth's magnetic field automatically using "linearization" once the boat reaches a speed between 3 & 15 knots & at least a 270 degree turn is made. You'll see a message "Detecting Magnetics" along with a progress indicator as the electronic compass sets up.
Once the Compass has Linearaized, you get a message. It took about 25 minutes which during that time I motored out of my canal & out to the river. This involved 3 turns and enough rotation to set up. That's it, your auto pilot is ready, I didn't have to make any circles like the older unit with the Fluxgate type compass. Pretty neat!

The compass continually monitors and adapts to current conditions. The compass offset can be adjusted and locked if you need to.
Below is a link to Raymarine's video showing the set up:
Everything seems to work as it should. I made a few adjustments and added some data boxes from my GPS and tested going to some waypoints. There are plenty of other features to the system but at this point it's ready for operation.


Comments
Post a Comment