The Dreaded Dripless Shaft Seal - Part II
The first order of business (besides hauling & blocking) was separating the shaft from the coupling. I started 2 days prior by soaking the 2 bolts with PB Blaster (a penetrating spray oil). The coupling is a "split" type so after the bolts were removed, some wedges were driven in to open up the coupling some. With a little persuading the shaft came out. I wasn't watching what my mechanic friend JD was doing to get it out but one method is to loosen the bolts that hold the coupling to the transmission then insert a socket that is slightly smaller than the shaft, then tighten the bolts in sequence to "push" the shaft out. I heard some banging so i don't think that is what he did. I wouldn't recommend beating on a shaft but I believe that is what he did (a few tell tale ding marks left behind).
The next step was to remove the rudder so we could slip the shaft out. The stainless steel keel guard needed to be removed. Not sure why, or maybe it is a usual thing but the nuts holding the keel guard on were buried in Silicone. We joked that they were trying to streamline the old girl and pick up some speed or perhaps it kept lines & debris from snagging? A doughnut of Silicone was around the bottom of the rudder connection as well. At least I think it was silicone, I don't think 5200 could be built up like that without sagging.
JD moved up to the Lazarette & removed steering arm, packing & the keyway for the rudder & it slipped out. After that it was just a matter of pulling the shaft out, we left the prop still attached to make it easier to pull out & handle the shaft. Interesting that there was no zinc on the shaft. The information I had with the boat says to use "1 1/2" x 2 1/2" egg shaped and cut it down to approximately 1 1/2". I purchased that size zinc but I still think 1 1/2" may be too big so I purchased a Collar zinc that was 1 1/4".
JD took an air hammer & was able to move it forward, so we knew it would move, then I went into the Lazarette & with a large 1 7/8" socket & long extension slammed it repeatedly to the rear until it popped out. Guess what, there were drag marks from 2 set screws! They were fiberglassed in! I located them from the inside & carefully drilled out the fiberglass on top of them so we could back them out & use them to re-set the cutless. One was on top at 12 O'Clock & the other at 3 O'Clock.
Also since the shaft was out I replaced the rear bilge pump. It would be nearly impossible to get to once the shaft goes back in. The forward bilge pump took a crap a few weeks ago so I figured this one could do the same & it is by far the most important one of the 2 located in the boat.
After placing the new cutless bearing in the freezer over night to make it easier to install, I headed to Twin Rivers Marina with it on ice. I had the shaft, keel guard, rudder & zincs, ready for the re-installation. The cutless slid in with very little tapping. I let it warm up then drilled some "dimples" in each of the set screw holes to give them something to bite to. When I re-installed the screws I was careful to get them tight but not sure what they were threaded into didn't want them to blow out. I used a little 5200 on these as well and later in the day filled the holes with fiberglass filler, sanded & bottom painted it.
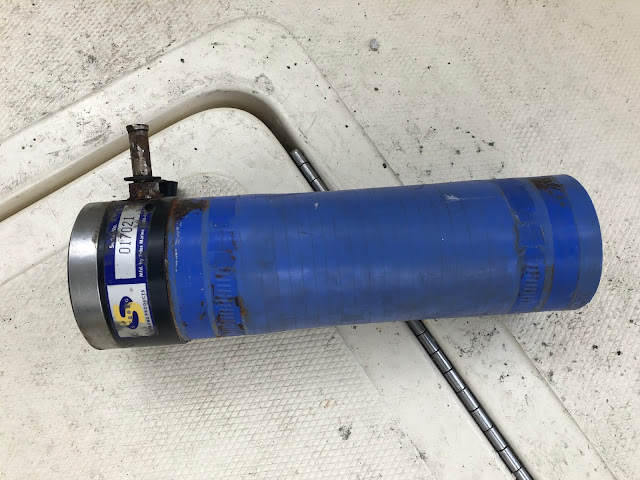
The shaft slid in easily with a little resistance but I had to attach the prop to give myself something to grip on to to get it to the coupling. When I got it close to the coupling I placed the dripless & spare seal & carrier on. The new dripless seems well made but the old Tides “Strong Seal” seemed to me to be much heavier duty in both the seal, cutless length & even a heavier hose. I believe that is why it lasted as long as it did. Time will tell as to the longevity of the new seal. I ordered the shaft seal from Citimarine in Miami, great folks & quick shipping.
This was as far as I could go without help. Once JD got there I worked the prop and he reassembled the coupling. It took some good whacking but it went together nice & snug. With the shaft to the coupling I could complete the dripless. The shaft had some minor scoring from the old seal but the new seal was 2" shorter and landed on a smooth section of the shaft.
We completed the rudder & keelguard assembly re-packing the rudder since we had it disassembled. Once everything was together I filled the area as before with a glob of silicone & when that set up painted it. The last item was the collar zinc for the shaft.


very informative. thanks for taking the time to post. ron
ReplyDelete